
Raised Beds from Start to Harvest: A Complete Backyard Gardening Guide
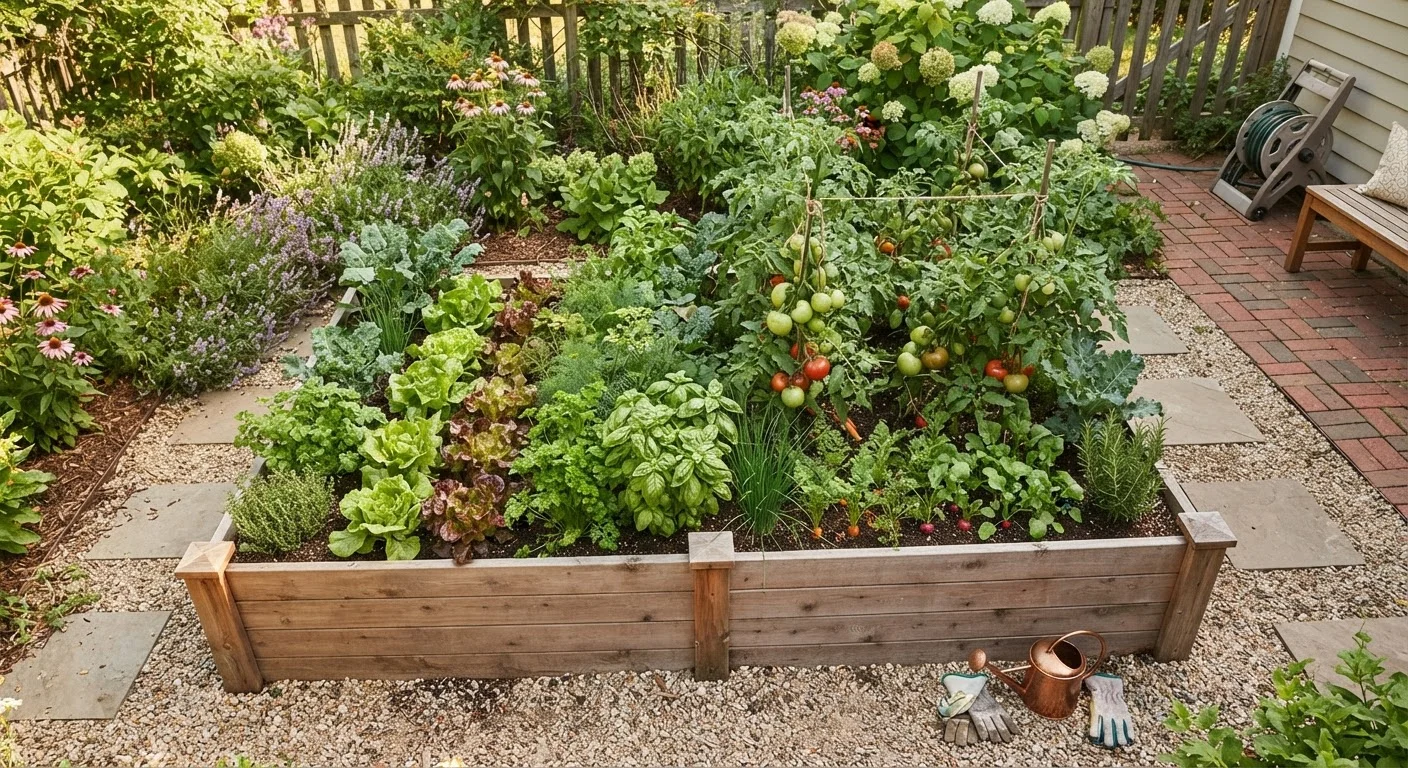
Photo credit: ResultsRover.com | Insights You Can Trust
In this article
Everything you need to know about raised bed gardens — from choosing lumber and fill mix to planting schedules and seasonal care.
Key Takeaways
- Raised beds warm faster in spring, drain better, and prevent soil compaction — giving plants a head start.
- Untreated cedar and Douglas fir are durable, safe lumber choices; avoid wood treated with older preservatives.
- The ideal fill mix is roughly 60% topsoil, 30% compost, and 10% coarse material like perlite or aged bark.
- Most vegetables need at least 6–8 hours of direct sunlight daily — site selection is the single biggest factor in yield.
- Consistent shallow watering and annual compost top-dressing keep beds productive for years.
- Strategic planting — cool-season crops in spring and fall, warm-season crops in summer — can stretch your harvest window.
Why Raised Beds Outperform In-Ground Gardens
Raised beds give everyday gardeners a meaningful edge over traditional in-ground plots — and the benefits compound with every season. Because the soil sits above grade, it warms up earlier in spring, letting you transplant seedlings or direct-sow seeds weeks before your neighbors with flat beds can. That extended growing season translates directly into more harvests per year.
Drainage is another major advantage. Native soil — especially clay-heavy or compacted suburban soil — can suffocate roots after heavy rain. A raised bed filled with a purpose-built mix drains freely, so roots stay oxygenated. You also control every cubic inch of what your plants grow in, which means fewer weeds, fewer soil-borne diseases, and none of the mystery of what previous owners may have applied to the ground.
Finally, raised beds are physically easier to tend. A standard 12-inch-tall bed reduces the bending and kneeling that make traditional gardening hard on backs and knees. For anyone looking to create a low-maintenance outdoor space, raised beds are one of the most practical starting points.
6–8 hrs
Daily sunlight most vegetables require
University extension programs consistently cite 6–8 hours of direct sun as the minimum for productive vegetable growing.
2–4 weeks
Earlier spring planting vs. in-ground beds
Raised bed soil warms faster because it is surrounded by air on all sides, allowing earlier planting than flat ground in the same location.
10–15 yrs
Typical lifespan of untreated cedar beds
Cedar's natural oils resist decay; properly built cedar raised beds commonly last over a decade with basic annual maintenance.
Choosing the Right Size, Material, and Location
Size: The most useful raised bed is 4 feet wide — the distance most adults can comfortably reach to the center from either side without stepping in. Length is flexible; 8 feet is a popular standard. Depth matters for root development: 10–12 inches supports most vegetables, but root crops like carrots and parsnips benefit from 18 inches.
Material: Untreated cedar is the classic choice because it resists rot naturally and does not leach chemicals into soil. Douglas fir and pine are less expensive and work well, though they'll need replacement sooner — typically in 5–7 years compared to cedar's 10–15. Avoid wood that has been treated with older preservatives (look for labels beyond current ACQ or CA treatments if you have concerns); galvanized steel and food-safe composite boards are solid alternatives.
Orient Beds for Maximum Sun Exposure
If your yard runs north-south, orient your raised beds along a north-south axis so all rows receive roughly equal sunlight throughout the day. In east-west yards, place taller plants on the north end of the bed so they don't shade shorter crops. A few minutes spent observing sun patterns before building saves years of underperformance.
Location: Place beds where they'll receive at least 6 full hours of direct sun. Observe your yard at different times of day before committing — shade from a fence or tree that seems distant in the morning can swallow a bed by afternoon. Position beds close to a water source to make irrigation effortless. If you're combining beds with paths or borders, our guide on hardscaping on a budget can help you plan the surrounding layout.
Building the Perfect Soil Mix
Native yard soil alone is too dense for a raised bed — it compacts under its own weight and blocks drainage. The standard mix that consistently performs well is sometimes called "Mel's Mix" or a variation of it: approximately 60% quality topsoil or loam, 30% finished compost, and 10% coarse amendment such as perlite, vermiculite, or aged wood bark. This blend holds moisture without waterlogging and feeds plants steadily as the compost breaks down.
Compost is the engine of a raised bed. It introduces beneficial microorganisms, slowly releases nutrients, and improves texture year after year. If you're not already recycling kitchen and yard scraps, our guide to starting a compost pile at home explains how to build a steady supply of finished compost.
Before filling, test your native soil's pH if you plan to mix in any of it. Our companion article on soil pH and your garden walks through what the numbers mean and how to adjust accordingly. Most vegetables thrive in a pH of 6.0–7.0.
Layer your compost with topsoil in stages as you fill the bed — don't just dump each material in separately. Alternating 3-inch layers and raking them together creates a more uniform mix with fewer air pockets.
Uneven mixing leaves pockets of dense soil or pure compost that can create wet spots or nutrient hot spots, both of which stress plant roots.
Place a sheet of cardboard — single layer, no tape or staples — on the ground before adding soil. It smothers grass and weeds without chemicals, then breaks down within a season.
Cardboard is a well-established organic weed-suppression method that improves microbial activity as it decomposes, and it costs nothing if you save shipping boxes.
Planting Schedules and What to Grow
Raised beds are well suited to a two-season planting approach. Cool-season crops — lettuce, spinach, kale, peas, radishes, and broccoli — tolerate light frost and should go in 4–6 weeks before your last expected frost date in spring, then again 6–8 weeks before the first fall frost. Warm-season crops — tomatoes, cucumbers, beans, squash, and peppers — need soil temperatures above 60°F and should be transplanted or direct-seeded after all frost risk has passed.
Succession planting — sowing small batches every 2–3 weeks instead of all at once — prevents a glut and keeps the harvest coming steadily. A 4×8-foot bed can realistically support one or two tomato plants, a row of lettuce, a cluster of herbs, and a few pole beans if you train them vertically.
Pairing plants strategically can also reduce pest pressure naturally. Our article on companion planting covers which combinations work and which to avoid.
Avoid Overcrowding — It Backfires Quickly
It's tempting to fill every inch of a new raised bed, but overcrowded plants compete for light, water, and nutrients — and poor airflow accelerates fungal diseases like powdery mildew. Follow the spacing on seed packets and transplant tags. A bed of well-spaced plants will outyield a crammed one by midsummer.
Watering, Feeding, and Ongoing Care
Raised beds dry out faster than in-ground gardens because drainage is more efficient and the exposed sides allow evaporation. Most vegetable beds need about 1 inch of water per week, delivered deeply and less frequently rather than in short daily bursts. A drip irrigation line or soaker hose laid at soil level is far more efficient than overhead watering — it delivers moisture directly to roots and keeps foliage dry, which reduces fungal disease.
Feeding is straightforward when the soil mix contains plenty of compost. Top-dress with 1–2 inches of finished compost each spring before planting; this typically provides enough slow-release nutrition for most crops. Heavy feeders like tomatoes and squash may benefit from a balanced granular fertilizer mid-season — follow product label directions rather than applying more, which can cause problems rather than solve them.
Mulching the surface with 2–3 inches of straw or shredded leaves conserves moisture, moderates soil temperature, and suppresses weeds. It's one of the simplest interventions with the highest return on effort.
Do Not Let the Bed Dry Out Completely
Raised beds with free-draining soil can go from moist to bone dry in as little as two days during summer heat, especially in smaller beds. Once roots are stressed by drought, plants may drop fruit, bolt to seed, or become susceptible to pests — and rehydrating severely dry soil mix can take multiple slow waterings to fully penetrate. Check moisture by pressing a finger 2 inches into the soil every day or two during hot stretches.
Seasonal Transitions and Year-Round Maintenance
At the end of each growing season, clear spent plants promptly to reduce disease carry-over. Pull roots rather than snipping at soil level when possible, especially for plants that showed any signs of disease. Add a fresh layer of compost, and if you're not planting a fall crop, cover the bed with a thick mulch layer to protect soil structure over winter.
Our fall yard prep checklist covers the full outdoor shutdown process, including draining irrigation lines and storing tools — steps that protect your investment in the bed itself.
Inspect the bed frame each spring for signs of rot or shifting. Joints can be reinforced with corner brackets if boards begin to bow outward under soil pressure. Replenish soil volume lost to settling by adding fresh compost — beds typically lose 1–2 inches of height per year.
With consistent seasonal care, a well-built raised bed can produce reliably for a decade or more, making it one of the most cost-effective improvements a homeowner can make to their outdoor space. For help thinking through the upfront investment, the household budgeting guide can help you plan the expense alongside other home priorities.
Raised Beds and Local Regulations
Most municipalities do not require permits for freestanding garden beds, but some HOAs have rules about structures, heights, or placement near property lines. Check your HOA guidelines or local zoning rules before building — particularly if your bed will be permanent, large, or include irrigation. A quick call to your local planning office takes minutes and avoids potential headaches.
“The single greatest return on investment in any garden is building the soil first. Everything else — watering, feeding, pest control — becomes easier when the foundation is right.”
— Extension Horticulture Specialist, Land-grant university cooperative extension service

Author
Home & Garden Editorial Team
Home & Garden Editorial Team is the collective byline for our editorial team and contributor network. Articles published under this byline or an editorial pen name are researched, written, and reviewed according to our editorial standards for clarity, consistency, and independence before publication.
View all articles →