
Bathroom Upgrades That Look Expensive Without the Price Tag
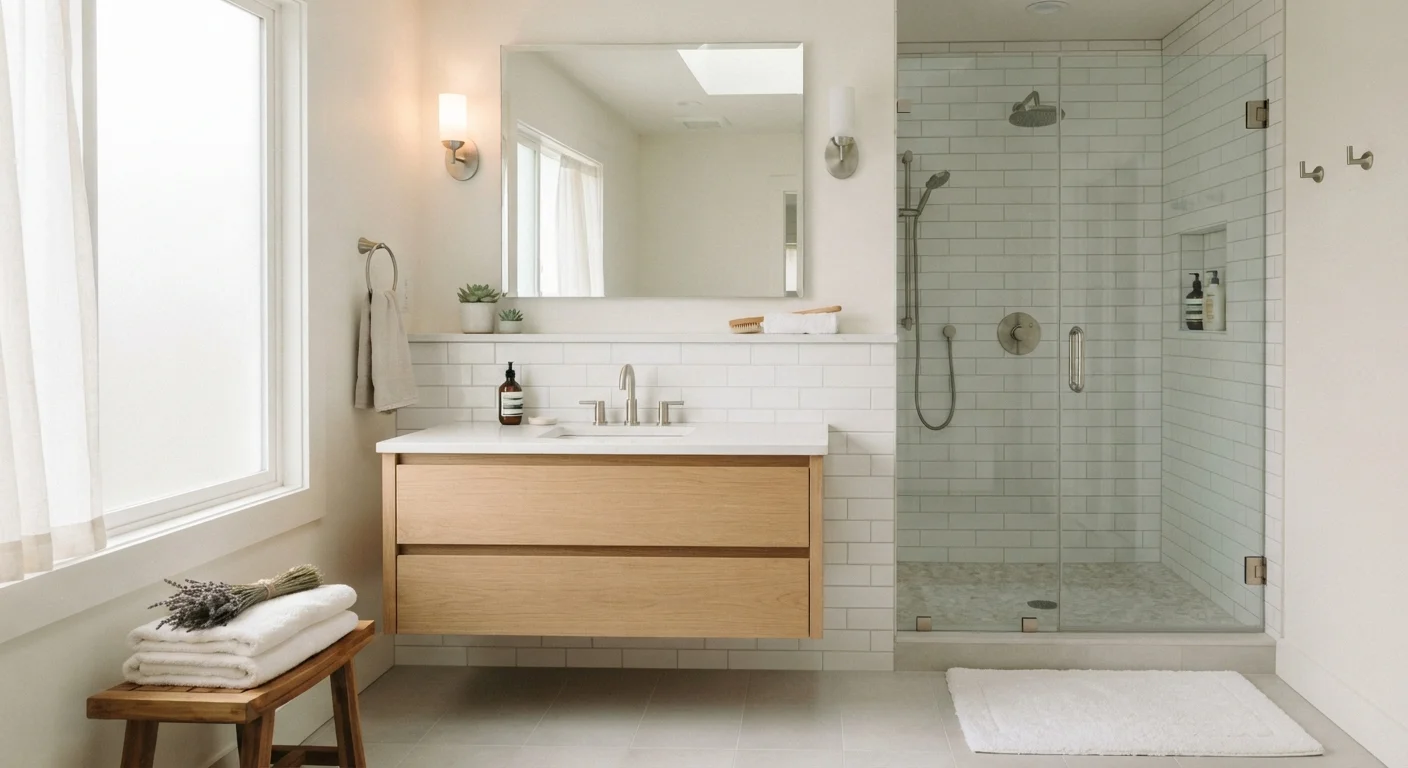
Photo credit: ResultsRover.com | Insights You Can Trust
In this article
Swapping fixtures, adding a vanity mirror, or retiling just the shower surround can make a bathroom feel professionally renovated on a modest budget.
Key Takeaways
- Swapping faucets, light fixtures, and cabinet hardware can dramatically update a bathroom's look for under $200.
- Retiling only the shower surround - not the entire floor - delivers maximum visual impact at a fraction of full-tile costs.
- A well-chosen vanity mirror can make a small bathroom feel larger and more polished instantly.
- Paint formulated for humid spaces is one of the highest-return investments in any bathroom refresh.
- Strategic upgrades focused on what eyes see first save money without sacrificing the renovated look.
Why Targeted Bathroom Upgrades Work
A full bathroom gut renovation can easily run into the tens of thousands of dollars - and it's rarely necessary to achieve a dramatic improvement. The rooms that feel expensive almost always share a pattern: every visible surface reads as intentional and cohesive. That effect is entirely achievable with targeted changes, provided you know which elements carry the most visual weight.
The upgrades below focus precisely on those high-visibility areas. None require demolition permits, structural changes, or a contractor on speed dial. Many qualify as weekend projects - and a few take less than an afternoon. For guidance on setting a realistic budget before you start, see our budgeting basics hub, and keep in mind that renovation myths can lead you to overspend on changes that deliver little return.
When to Call a Licensed Professional
Most cosmetic bathroom upgrades are safe DIY territory, but a few tasks require licensed tradespeople. Any work involving your home's electrical panel, moving or adding plumbing supply lines, or altering load-bearing structures requires a licensed contractor in most jurisdictions - and typically a permit. Check your local building department requirements before starting any work that goes beyond surface-level cosmetics.
Upgrades That Deliver the Most Impact
Replace the vanity light fixture
Vanity lighting is one of the first things visitors notice, yet original builder-grade fixtures are almost universally flat, dated, and unflattering. Swapping a single-bar fixture for a style with individual globe bulbs or a horizontal bar in brushed nickel or matte black immediately reads as deliberate design rather than default. The electrical work typically involves disconnecting two wire connectors and reconnecting them to a new fixture - well within the comfort zone of most handy homeowners. If you have any doubt about working with your home's wiring, hire a licensed electrician; this is not a task to guess through. Replacement fixtures span a wide price range, so you can match your budget without sacrificing finish quality.
Vanity lighting is what visitors notice first - swapping the fixture is one of the highest-impact changes you can make.
Upgrade the faucet and drain cover
A chrome faucet with visible water stains and worn finish telegraphs age immediately, while a clean, modern faucet in a coordinating metal finish signals quality. Single-handle faucets with a high-arc spout are particularly effective at adding a designer look. Match the finish to your new light fixture - brushed nickel, matte black, and oil-rubbed bronze all pair cleanly with white or gray palettes. While you're at it, swap the drain cover to the same finish. It's a $10 detail that most people overlook and that ties the whole sink area together.
Matching your faucet finish to your light fixture creates a coordinated, intentional look for very little cost.
Install a frameless or large-format mirror
Builder mirrors are almost always framed in a thin strip of aluminum and sized just large enough to be functional. Replacing that mirror - or framing it with a pre-made mirror frame kit - adds architectural presence and reflects more light, making the room feel larger. A mirror that spans most of the vanity width is particularly effective. If you're replacing rather than framing, look for beveled-edge mirrors, which add depth without requiring a separate frame. Mounting a new mirror typically requires only a stud finder, wall anchors, and basic hardware.
A wide, frameless mirror reflects more light and makes a small bathroom feel noticeably larger.
Retile the shower surround only
Full bathroom tile replacement is expensive and disruptive. Retiling just the shower or tub surround - the three walls inside the shower - delivers the visual payoff of a tiled renovation at a fraction of the cost. Large-format subway tile, peel-and-stick tile panels rated for wet areas, or classic 3×6 ceramic tile all work well here. Focus on a clean, neutral color with a well-executed grout line and the result looks professionally done. Note that any work involving waterproofing behind tile should be done correctly; improperly sealed shower walls can lead to mold and water damage behind the wall.
Retiling only the shower surround delivers renovation-level visual impact without the cost of full-room tile work.
Repaint with a moisture-rated formula
Fresh paint is the foundation of any cosmetic refresh, but in a bathroom, paint selection matters more than most rooms. Standard interior paint will bubble and peel in a humid environment within a few years. Look specifically for paints formulated for kitchens and bathrooms - they include mildew-resistant additives and cure to a harder, more washable surface. A well-chosen color in a satin or semi-gloss finish unifies all your other upgrades. Lighter values make small bathrooms feel more open; deeper tones can work beautifully when paired with adequate lighting. This is one of the most straightforward home improvement projects to plan and execute yourself.
Moisture-rated paint is one of the best-value investments in any bathroom - it lasts years longer than standard formulas.
Swap cabinet and drawer hardware
Vanity cabinet hardware - pulls, knobs, and hinges - is often overlooked but contributes meaningfully to the overall finish of the room. Replacing worn chrome or brass hardware with a coordinating finish takes less than an hour per cabinet and requires only a screwdriver. When choosing new hardware, check the existing hole spacing before purchasing to simplify installation. Solid bar pulls in a matching metal finish to your faucet and light fixture complete the coordinated look. If existing screw holes don't align with new hardware, small wood filler patches are simple to apply and paint over before installation.
Cabinet hardware that matches your fixture finish completes the coordinated look for just a few dollars per piece.
Coordinate Finishes Before You Buy
Pick one metal finish - brushed nickel, matte black, or oil-rubbed bronze - and apply it consistently to your faucet, light fixture, towel bars, and cabinet hardware. Mixing finishes unintentionally is one of the most common reasons DIY upgrades look unfinished. Decide on your finish first, then shop everything else around it.
Making Your Upgrades Last
The difference between an upgrade that looks good for a year and one that looks good for a decade is mostly preparation and product selection. Bathrooms are humid, high-traffic spaces, so every material you introduce needs to be rated for moisture exposure. Grout should be sealed after installation. Paint should be labeled for kitchens and bathrooms. Hardware should be solid metal, not plated plastic that chips at the edges.
If you enjoy the process, many of these same principles apply throughout the house. The weekend projects guide covers comparable quick-win improvements for living spaces, kitchens, and more. And if you want to build smarter spending habits around home improvements overall, the smart spending hub offers practical frameworks for making every dollar go further.

Author
Home & Garden Editorial Team
Home & Garden Editorial Team is the collective byline for our editorial team and contributor network. Articles published under this byline or an editorial pen name are researched, written, and reviewed according to our editorial standards for clarity, consistency, and independence before publication.
View all articles →