
Planning a Kitchen Refresh Without a Full Renovation
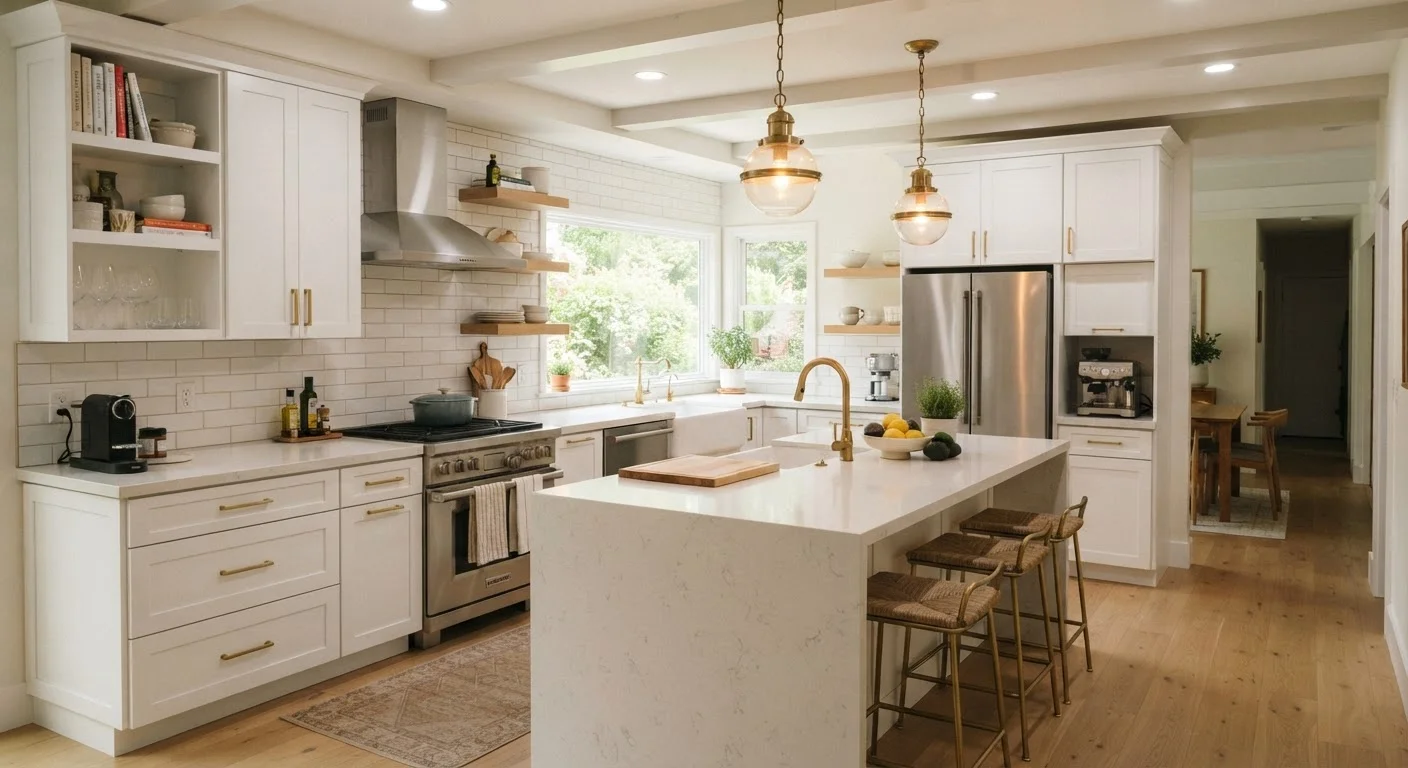
Photo credit: ResultsRover.com | Insights You Can Trust
In this article
Cabinet refacing, new hardware, updated lighting, and a fresh backsplash can transform a kitchen without the cost or disruption of a gut renovation.
Key Takeaways
- Cabinet refacing or painting costs a fraction of full cabinet replacement and delivers strong visual impact.
- Swapping hardware, lighting, and faucets are low-cost upgrades any motivated homeowner can tackle.
- A new backsplash can be completed in a weekend and dramatically changes the kitchen's character.
- Setting a realistic budget before shopping prevents overspending on upgrades that don't add proportional value.
- Prioritizing high-visibility surfaces first gives the most return on every dollar spent.
Why a Refresh Outperforms a Full Renovation for Most Homeowners
A complete kitchen gut renovation - new cabinets, countertops, appliances, flooring, and layout changes - can run well into five figures and displaces a household for weeks. For most homeowners, that level of disruption and expense isn't justified, especially when the kitchen's core layout and cabinet boxes are structurally sound.
A targeted refresh instead zeroes in on the surfaces and fixtures that define how a kitchen feels: cabinet color and style, hardware finish, lighting quality, and the backsplash. These are the elements a guest or potential buyer notices first. Done thoughtfully, a refresh can make a 20-year-old kitchen look contemporary without touching a single wall or appliance line.
Before diving in, review our guide to planning and executing a home improvement project from start to finish - especially the sections on budgeting and timeline-setting. That groundwork prevents the overspending and mid-project surprises that derail many well-intentioned refreshes.
Plan the Whole Look Before Buying Anything
Before purchasing a single cabinet pull or tile sample, sketch or photograph your existing kitchen and map out every planned change together. Hardware finish, backsplash color, and lighting tone need to work as a coordinated set. Making decisions in isolation is how mismatched kitchens happen.
What You'll Need Before You Start
Gather your tools and confirm your budget before purchasing materials. Having the right supplies on hand from day one prevents the project stalls and improvised shortcuts that lead to uneven results.
Screwdriver set (flathead and Phillips)
Removing and installing cabinet hardware, outlet covers, and light fixtures.
Painter's tape
Protecting walls, countertops, and trim during painting or caulking work.
Degreaser cleaner
Preparing cabinet surfaces so paint or veneer adheres properly.
Foam rollers and angled brush
Applying cabinet paint smoothly with minimal brush marks.
Tile adhesive and grout
Installing peel-and-stick or thin-set backsplash tiles.
Measuring tape and level
Ensuring hardware placement and tile rows stay aligned and even.
What you will need
Electrical and Plumbing Work Requires a Pro
Upgrading under-cabinet lighting or relocating a faucet supply line may involve electrical or plumbing work that requires a licensed contractor and, in many jurisdictions, a permit. Never attempt to alter wiring, junction boxes, or main supply lines yourself. Check local codes before starting any project that touches these systems.
Step-by-Step: Refreshing Your Kitchen
Work through the steps below in order - budget and planning first, cosmetic changes after. Each stage builds on the last, and completing them in sequence prevents backtracking (for example, avoid installing backsplash tile before finalizing cabinet color, since grout lines and tile edges need to meet painted surfaces cleanly).
Assess Your Kitchen and Set a Firm Budget
Walk through your kitchen with fresh eyes and note every element that feels dated or worn: cabinet door style, hardware finish, lighting fixtures, backsplash, faucet, and paint color. Rank them by visual impact. Cabinets and lighting dominate the room's overall feel; hardware and backsplash play strong supporting roles.
Assign a realistic dollar ceiling to each category before you shop. Knowing your total limit prevents scope creep - the single biggest budget-killer in kitchen projects. Common home improvement myths often lead homeowners to overspend on changes that don't add proportional value.
Choose Cabinet Refresh Strategy: Paint or Reface
If your cabinet boxes (the structural frames) are solid, you have two cost-effective options. Painting works well when the existing doors have a smooth or lightly routed profile - strip the hardware, degrease thoroughly, sand lightly, prime, and apply two coats of cabinet-specific paint. Refacing involves applying a thin veneer or laminate to existing door faces and replacing doors while keeping the boxes, typically costing 30-50% less than full cabinet replacement.
Both approaches require the same critical prep: clean surfaces free of grease and old wax. Skipping prep is the most common reason DIY cabinet projects fail prematurely.
Swap Hardware for an Immediate Visual Upgrade
Cabinet pulls and knobs are among the highest-impact, lowest-cost swaps available. Measure the center-to-center distance on existing pull holes before purchasing replacements - standard spacings are 3 inches and 5 inches, and matching them eliminates re-drilling. Choose a finish that coordinates with your faucet and any visible appliance trim.
This project pairs well with other weekend projects that transform a room and can typically be completed in two to three hours.
Refresh Lighting Fixtures and Under-Cabinet Lights
Overhead lighting that was installed decades ago often casts a yellow, flat light that makes even clean kitchens look dingy. Replacing a dated flush-mount fixture with a more open pendant or semi-flush style can meaningfully brighten the space. Under-cabinet lighting - particularly LED tape or puck lights - eliminates counter shadows and adds a layer of functional task lighting.
Plug-in under-cabinet options require no electrical work and are a straightforward DIY project. Hardwired fixtures should be handled by a licensed electrician.
Install a New Backsplash
The backsplash zone - the wall space between countertop and upper cabinets - is one of the most visible surfaces in the kitchen and one of the most achievable weekend upgrades. Peel-and-stick tile panels work on clean, flat surfaces and require no adhesive mixing or grout skills. Traditional thin-set tile with sanded grout takes more skill but lasts longer and offers more design options.
Measure the square footage carefully and add 10% for cuts and waste. Work from the center of the focal wall outward so cuts fall at the edges rather than the middle.
Finish with Paint and Small Detail Updates
Once cabinets, hardware, lighting, and backsplash are addressed, a fresh coat of wall paint pulls the whole refresh together. Choose a color that complements - not competes with - your new backsplash and cabinet finish. Warm whites, soft greiges, and muted sage tones remain versatile and broadly appealing.
Paint consistently ranks as one of the highest-ROI home improvements - and in a kitchen refresh, it serves as the affordable finishing coat that unifies every other change you've made.
Avoid Skipping Surface Prep
Painting or refacing cabinets over greasy, unwashed surfaces almost always leads to peeling within months. Thorough degreasing and light sanding are non-negotiable first steps. Skipping them is one of the most documented causes of DIY cabinet project failures - and fixing it later costs more than doing it right the first time.

Author
Home & Garden Editorial Team
Home & Garden Editorial Team is the collective byline for our editorial team and contributor network. Articles published under this byline or an editorial pen name are researched, written, and reviewed according to our editorial standards for clarity, consistency, and independence before publication.
View all articles →